Welcome to my blog

I hope you enjoy reading my posts, and please leave me a comment. I always enjoy reading them, and will try to visit you in return.

For security reasons for me and for you, I would appreciate it if you would leave your name on your comments.

You are welcome to copy any of my designs, as long as you do not take credit for them yourself. I am very happy for you to sell them. If I have used anyone else's design, I always try to give credit where it is due. If I have missed anything, please let me know and I will put things right.


This is intended to be mainly about my crafting stories, as a personal record of what I do. However, I interpret crafting quite widely, not just paper crafting but other things too. I have a butterfly mind and like to change from one thing to another depending on what I feel like on a given day - knitting, crochet, cross-stitch, cards, baking and several others, including my favourite right now, parchment, both traditional skills and Groovi, very relaxing and calming to do.

I have decided to put some structure into my blog so that each day will have something of a theme.
Monday- for Mindfulness; Tuesday - Tidy Up Day; Wednesday - What's on Your Workdesk Wednesday; Thursday - Technique and Tips; Friday - Finish Off Day; Saturday - Start Something New; Sunday - Anything Goes
These themes are not hard and fast and will be changed if I feel the need.

Tuesday, 30 June 2015

Clarity Stamp Challenge for June 2015 - Boys, Boys, Boys

Once again, I am late putting my entry in for this month's Claritystamp challenge, which was Boys, Boys, Boys.  I put the blame fair and square on Barbara Gray.  Since taking delivery of the new Groovi Plate system, I have not wanted to put it down.  Parchment has taken over my life again.

Fortunately, my class on a Friday used the Clarity Sport set and I just took the brief a bit further. I did do the cut out of the central O (you would have been proud of me, Maria) and used my blade to do it.  Then I masked off that bit while I did the landscape with torn paper and the Clarity mat.  The sky was the Clarity cloud mask.  The whole aim was a misty, faded view, with the stamped images done in second generation ink.

I did darken up the sky and grass in the centre O around the cyclist.  The large Sport was heat embossed in a distress type powder, which does not really show very well.


In additon to the normal Friday class, I went down to the class on Saturday morning at Pink Tulip Creations where we did two cards, as you can see below.  Because we were using Brushos for the second card, and could not all do that at the same time, the two cards were running at the same time.  The first one was using the Stampendous Ranunculus, which I think is very like the Charles Rennie Mackintosh rose as you can see in this illustration.
Most people painted their flowers, but I decided to play with the blendable pencils.  I used the Derwent as I have a small set that fits in my bag and will do most things.    Unwittingly, I matched the colours to the top I was wearing, although the others thought it was deliberate.  


The Brushos were really a taster session for those that have never used them, but it was a very effective technique, much better than this photo shows.  We punched large circles out of the dried off Brusho sheet and then stamped the heads of this Lavinia stamp onto the circles with Archival, and then glittered the open tips of the flowers.  The whole thing was stamped onto the main card and the
flower circles glued on top.

This card is so much more pretty in real life as the sparkle just does not show here.


Wednesday, 24 June 2015

WOYWW 316

 The speed of the passing of 2015 is positively terrifying.  I am sure New Year was only last week, although I do remember going down to the Crop in May.  I do not seem to be doing very well at blogging this year either.  A quick blink of the eyes and another Wednesday is over and done with.  If you are wondering why Wednesday is a significant day of the week, then I will leave it to our Julia to explain far better than I all about WOYWW (What's On Your Workdesk Wednesday).

I am still trying to get all my stuff back into my craft room where it belongs.  However, that ambition is not helped by certain people bringing out new "must have" products and the NEED to try them out and see just what I can do with them.   These pictures of my temporary desk/picnic table show some of my latest acquisitions.


The major new product is the recently launched Groovi plate system for parchment from Clarity.  Although I have done parchment for several years, this new system, designed for beginners and experienced parchers alike, has been impossible to leave alone.  The little picture was partially done on the Groovi plate, although the central design was transferred from this week's Mindfulness colouring download from Barbara Gray.  I mounted it on a black painted canvas board.


I also went to a demo of Sissix products down at our local craft shop, Pink Tulip Creations, which was excellent.  The demonstrator, Pete Hughes, certainly did a great job and I learned a lot of hints and tips and was reminded of a lot more.  As you can see, I did not leave it at just watching the demo.
 

The Colour Burst powders, still in their packets, are very similar to Brushos, but a little more controllable.  I need to get them out and play very soon, so I am having to be very strong and resist while I finish resorting my stamps again.

How many of you are heading down to Burbage again later this year?  I am really looking forward to that trip and hope to meet up with lots of you then.

Right now, it is time I pointed you in the direction of our hostess with the mostest, Julia, who will send you on round the other desks on show this week.  I hope to visit as many of you as possible during the rest of the week.  Have a great week, all of you.

Friday, 29 May 2015

Clarity Stamp challenge for May - Clocks

The brief for this challenge was to explore the different ways of incorporating clocks into your artwork.  From the moment I read this, all I could think of was this song and my entry comes directly from that idea.
 
 
All the stamps are from Clarity.  It is just the sentiment that does not come from Clarity but is just the title of the song, sung by Stanley Holloway in "My Fair Lady".

The clock part comes from the use of two of the small fob watches.  The round full face one made the wheels of the carriage - hence the on time reference.  The side facing ones, I had the idea of blacking out the faces and turning into people forming a guard of honour holding staffs.  The winders became their heads, onto which I drew top hats.  The bride and groom came from the new wedding Wee Folk.  The fence posts were created using the trunks of the trees in the background.

I actually made two cards to see which I preferred.  The first one, which is also the one I have decided to use as my entry, was done on white card, while the second was done on cream card.  I like both, the second being more moody, in my opinion.  However, the texture of the cream card meant that the stamped image needed work to fill in the gaps.

In both, the trees and the church were coloured in with blendable pencils, which I also used to edge the sentiment on each.

Now I have done this card as my entry, I will now go back and look at all the other entries.  I never look until I have finished in case it changes my ideas.

Wednesday, 27 May 2015

WOYWW 312 - six whole years of blogging

 What a great achievement - 6 whole years of blogging.  Well done, Julia.  You deserve a medal and our gratitude for putting up with us all for so long.  Thank you for all you do to keep us all going.

I will try to keep it short this week, as we all should but seldom manage.  My first photo is of the treetops that I can see from my craft room.  It just looked so beautiful this week with the different colours of foliage.

The next three photos are less pretty, but do show something of what I have been doing recently.  The things you can see are carefully placed to hide things that you are not allowed to see yet.   There are lots of backgrounds waiting for further inspiration.  Some are created using marbling with alcohol inks on water, and are on a variety of papers and card.  Others are the result of mopping up all the remaining ink left on the blending mat after an inky session.  Often, these mopping up pieces are the most useful as backgrounds.  I am often horrified to see people at classes just ignoring this bounty and washing it away.  What a shame and a waste of valuable inspiration.
 This batch were done on plain white card and a few on the ultra shiny Chromo card.  I like both sets of results.  The biggest difference is in what you can then use to colour in your stamping as coloured pencils work less well on the shiny card.


My final picture also shows the cover of the programme for this year's Land Rover National event which was held not far away at Eastnor Deer Park.  The picture covering the front and back cover shows an event from the past and is believed to be drivers lining up for a scenic drive round the estate, led by its former owner Major Ben Hervey Bathurst,  Note the lack of seat belts, roll cages and roof in many cases,  No Health and Safety in those days.

Now my caravan is finally sold, I only slipped over to see friends for the day, but it is a beautiful place to camp/caravan.

If anyone would like to swap ATCs, I do have a few spare ones apart from the one needed for the official swap, so just let me have your snail mail address and I will get them off to you asap.

Happy Birthday to all you deskers.

Wednesday, 20 May 2015

What's On Your Workdesk Wednesday 311 - Doesn't time fly?


 This is the first batch of the lovely ATC's I was given at the WOYWW Crop on Saturday.  What a great event in every way, so beautifully organised by our leader, Julia, and the lovely Lunch Lady Jan, who fed us so well again.  Rather than show all the ATC's in one great rush, I have chosen this year to do a few each week to give you a chance to really look at all the wonderful ideas and beautiful creations.  Top row, left to right - Fee Richardson, Eliza, Jo (Twiglet); bottom row - Cindy Ashplant, Chris, Helen.

The rest of my post today is really to show what has been on my various "workdesks" over the weekend down in Wiltshire, whether at the Crop, the B&B or in the car overlooking Avebury at the Sanctuary/Ridgeway car park.  I made some marble backgrounds and stamped the Clarity flowers on various types of paper or card.  I have been experimenting with what works well, what combination of pens and pencils give the best result on which type of media.


 This was one started from scratch and them mounted up when I got home, Clarity Wee Folk with a new stencil, Distress inks brushed through to create the landscape.

1
 These next ones were my experimental efforts, and actually did not bring me to a definite decision on what worked best,  It was just as case of liking them all in different ways.  The first three were stamped on alcohol ink marbled backgrounds on different card.  No 1 was on plain white card, then coloured with Aquamarkers, over the top of which I used my blendable pencil crayons to lift certain sections.
2

No 2 was done on the high gloss Chromo card, just using Aquamarkers.  On this occasion, the pencils could not find enough "tooth" on the card to make any impression.


No 3 was back to the plain white card with the mix of Aquamarkers and pencil work, just a different colour mix.

 
3


4
No 4 was on black card with just pencils  this time.  I like how the paler blue is slightly grainy and gives (to me) more impression of texture in the flower.  The colour also seems to glow.  This one was stamped and embossed in clear detail powder before colouring in.  Without embossing, it would be very hard to distinguish the outlines on the dark card.

5


No 5 has two versions, one using the Aquamarkers before the pencils and one with just pencils.  I will leave you to decide which you think is just pencil work.  I can see a very clear difference on the cream card.

As part of my experimenting/playing, I tried to do an alcohol background on shiny black card  - not successful at all.   I will forget that idea.

6
No 6 is the new Silk Ribbons Bouquet stamp (designed by Julie Owens) and again It was part of my experimenting with Aquamarkers and pencils mixed.  It looked good with the Aquamarkers alone but the highlighting with the pencils lifted it to a totally different level for me. The colours just became so much more vibrant
7


This very last offering is also a new stamp, designed by Amanda Branston, and just shows how a weed can also be a beautiful flower and worthy of our close attention.

On the subject of weeds versus flowers, the grass verges around the town have been glorious with huge swathes of golden dandelions, and are now billowing with the more delicate buttercups, both plants that we yank out of our gardens as weeds.  Out in the wild, they shine as they should.  Just take time to breathe and look at the glories that Mother Nature puts out there for us.


 Having waffled on for ever today, I will leave you now to visit some of the other desks on show over at Julia's Stamping Ground.  Have a good day wherever you are and whatever you are doing.


Wednesday, 6 May 2015

WOYWW 309 - Warning, not for those of a nervous disposition

I finally plucked up courage to dive into what has laughably been called a craft room  I took two photos on Tuesday, 4 hours apart.  This was the second day of the clear out and tidy up, four hours after the start.

This was where I started on Tuesday, which was a major improvement as you can see a little bit of floor.


And this was four hours later.  A little more floor, with a large bag of rubbish behind me and a box of recycling also out of sight.

By this time, I had trashed and then repaired a Martha Stewart butterfly punch.  It took a dive of my desk and landed in 5 separate pieces.  Oh dear, I said!  Good to know it could be put back so easily and still works.

By the time you read this, I will be back in there, with another rubbish bag and other bags for stuff that is being passed on to anyone who wants it.

I will leave you with one other photo, of the view from the front window on Tuesday afternoon.


Have a good week, all of you, and please do go and visit some of the other desks an show at Stamping Ground, where our Julia will be waiting to direct you.

Thursday, 30 April 2015

Clarity Stamp Challenge for April


There is leaving it late and then there is going down to the wire.  I was not helped today by various people turning up late.  However, this is my entry for the April Clarity Stamp Challenge.

I have used some of the lovely Wee Fairies and Elves, mixed with the fantastic castle and hollyhocks, all on a shaving foam background, with the shaving foam being pushed through a Clarity stencil.  The background was done at one of Sazz's workshops.

I also used a mixture of Spectrum Noir pencils and Derwent Coloursoft pencils to add colour to the castle and the flowers.

I apologise for the poor photo but the battery on the camera has now given up and there is no time to charge it.

PS Forgot to say that I brushed the base card with some Dusky Concord to tone with the Dylusion in sprays in the shaving foam.

 When I posted this in such a rush yesterday, I had trouble in getting a decent photo.  However, I did succeed today so here is  the shot taken today once I got the computer to talk properly to the scanner.  It shows the bit I like best where the shaving foam and ink almost look like quilting


Saturday, 25 April 2015

I love parchment craft

As a result of Barbara Gray's promise of something to do with parchment about to appear, I got my things out to have a play. The one with the Clarity Wallflower corner on was just done on a piece of scrap left over to test out the colouring, in particular.


 The first one with the posy of pansies was from a design by Robyn Cockburn and I used the same border on the second one with the three pansies.


They were drawn by me last year with the idea of trying to create a stencil from them. I still haven't worked that idea out but I like them as a parchment piece.


  The colouring on all three was done with a mixture of Derwent Coloursoft and Spectrum Noir pencils, and was also a mixture of colouring on the back and on the front. A lot of people think you can only colour on the back of parchment, but you can get a really delicate effect colouring on the front too. 

For anyone who has been following my blog for a while, you will know that I am a major fan of Derwent products and have most of what they produce.  They are made in this country and their products have been in my life since I was a child.

I am still a fan but I have been persuaded to give the Spectrum Noirs a real test, and from that, I have decided that they are both good products and they will actually work well together.  For example, I found that the Derwent white is stronger, while the blue from Spectrum worked better than the Derwent equivalent.  So, from now on, I will be using both sets together.  They blend together and the Derwent blender pencil will also work in the same way with the Spectrum Noirs, as does the Derwent burnisher pencil.

As far as I am concerned, you cannot have too many coloured pencils anyway.

Wednesday, 22 April 2015

WOYWW 307 - I am late again

I am late again today, but at least I got here on the right day, having been missing for the last few weeks.  My only excuse is I just keep losing days and those that I find rush past so fast.

This morning was just like that.  I took my photos, all ready to post, and then got sidetracked into carrying on with the parchment work I started last night, so you can see the progress I made this morning before I realised that Wednesday was half over again.

Why is it important to post on a Wednesday, you may ask?  Well now, where have you been if you do not know what happens on a Wednesday - What's On Your Workdesk Wednesday.  I could take up this whole post explaining it all to you, but someone else has already done it much better than I ever could - the lovely Julia, who is waiting to see you all at her Stamping Ground blog.

So now, I will show you my temporary desk in front of the tv, where I can see out of the window and also keep an eye on my two mischievous dogs.

Last week, I managed to finish making, write and seal all but two cards for sending this year.  Sounds good, but it did give me a slight problem as I then found I had nothing that I had to do.  then I realised that this achievement means that I have weeks and weeks of just playing with different techniques, old and new, or a mixture of lots of things.


As you can see, I have dug out some of my parchment work, really relaxing and so pretty when it is done.  Up till now, I have done very little colouring on parchment, preferring to stick mainly to the classic white.  However, this one will be coloured, when I work out what colours I want.  

This is actually a pencil sketch I did ages ago, trying to work out how to cut it as a stencil.  The stencil idea is still waiting but I decided last night that it could look pretty good in parchment and transferred the image in white pencil on to the sheet of parchment.  The bright pink is my new embossing mat which is brilliant used on the light box.

As you can see, I have taken it a lot further today, having got totally lost in doing it after breakfast.  The border is not my own design but is one from a pansy design by Robin Cockburn, who was generous enough to share her designs on the internet.

 You can also see another piece of parching, the triangular piece on the left.  This design is a Clarity stamp that I have been playing with a lot just lately, colouring and stamping on different media and in different colours, comparing different kinds of pencils etc.  The colouring is done mainly on the back, in this case with a mixture of Derwent Coloursoft and Spectrum Noir pencils.


You can also see some of the other bits and pieces I have been playing with, including a great bookmark design from Lynne Hammond, a lovely lady with great ideas.  Most of the colouring in was done while I was relaxing in the Holiday Inn at Shrewsbury at the weekend, just the right thing to play with.

I am going to stop waffling right now and let you get off to visit some of the other people showing their desks with the help of our Julia.  I hope you all have a great week.  xxxx

Wednesday, 25 March 2015

WOYWW 303

I apologise to those that left me messages last week.  Unfortunately, life got really complicated and I am ashamed to say that I did not manage to answer all your lovely comments, although I did read them.

This week is not doing any better, and is not helped by bringing a nasty cold and cough back from the NEC.  However, it is Wednesday again so time to visit all the other WOYWW friends.


This was the state of my table on Tuesday afternoon after a session of putting cards together, some of them from the last workshop with Maria Simms at Shrewsbury.  The others are ones that I have been playing with after watching Barbara Gray and Maria demoing at the NEC last week

The following pictures have already been up on Facebook so if you have already seen them, then just ignore them this time round and nip off to Julia to see all the other desks.  They show my new stash from the show.  I am dying to get busy with my new toy, the pyrography machine from Bob Neill, but with a stinking cough I will have to be patient for now.


Just to finish off, how many of you saw a decent eclipse on Friday.  Other people in the town had a reasonable view but not me.  The thicker clouds just rolled in and obliterated the eclipse proper.  I did get some good cloud shots though.


Wednesday, 18 March 2015

WOYWW 302

I was so determined to keep up to date on Wednesdays this year, but that resolution definitely took a dive early on.  I wish I knew where this year is flying off to, we are nearly a quarter of the way through 2015, which is really frightening.

I will keep it short and sweet this week and I will try to get round a few more desks too.

For those who wonder what is going on and why I should be showing you a right mess on a picnic table in front of the TV,  I can only refer you to our esteemed leader, Julia, at Stamping Ground, who will explain WOYWW far better than I can.

This is my working table photographed in the sunshine on Tuesday afternoon, but it is not much different so far today.


I have been busy, mounting up the four projects completed at Sally-Ann Hanes workshop from the weekend, so you will see those to the side.

In the centre are a few toppers created while playing with a couple of new sets of Clarity stamps, all ready to be mounted for use.

There is also my newly resurrected pot of Grunge Paste with which I have just started a new project on a canvas board, which I will show you next week, once it is finished and delivered to the recipient.


I will let you leave now and send you off  to see if Julia has the kettle on for refreshments on your way to visit all the other desks on show this week.  Have a great crafting week.

PS Is anyone going to the NEC this week?  Hope to see some of you there.

Monday, 16 March 2015

Clarity Stamp Challenge March 2015 - Anything but a card

If this theme for a challenge had come up a few months ago, I would just have ditched any idea of taking part.  However, I think many of us are starting to take our card making further into canvases and boxes and coasters, things that we can display around our homes.  We have been encouraged, dragged and kicked down that route by some of the beautiful tools that have been presented to us and all the fantastic inspiration of Barbara Gray and her fabulous Design Team.

I very deliberately avoided looking at any of the wonderful things from the Design Team as I wanted my inspiration to come from within me and I had ideas anyway.

It just happened that my youngest granddaughter's birthday falls this month and I found just what I wanted at an excellent local craft store, Pink Tulip Creations Ltd at Spernal in Warwickshire (just down the road).  It was a little wooden box in the shape of a book.

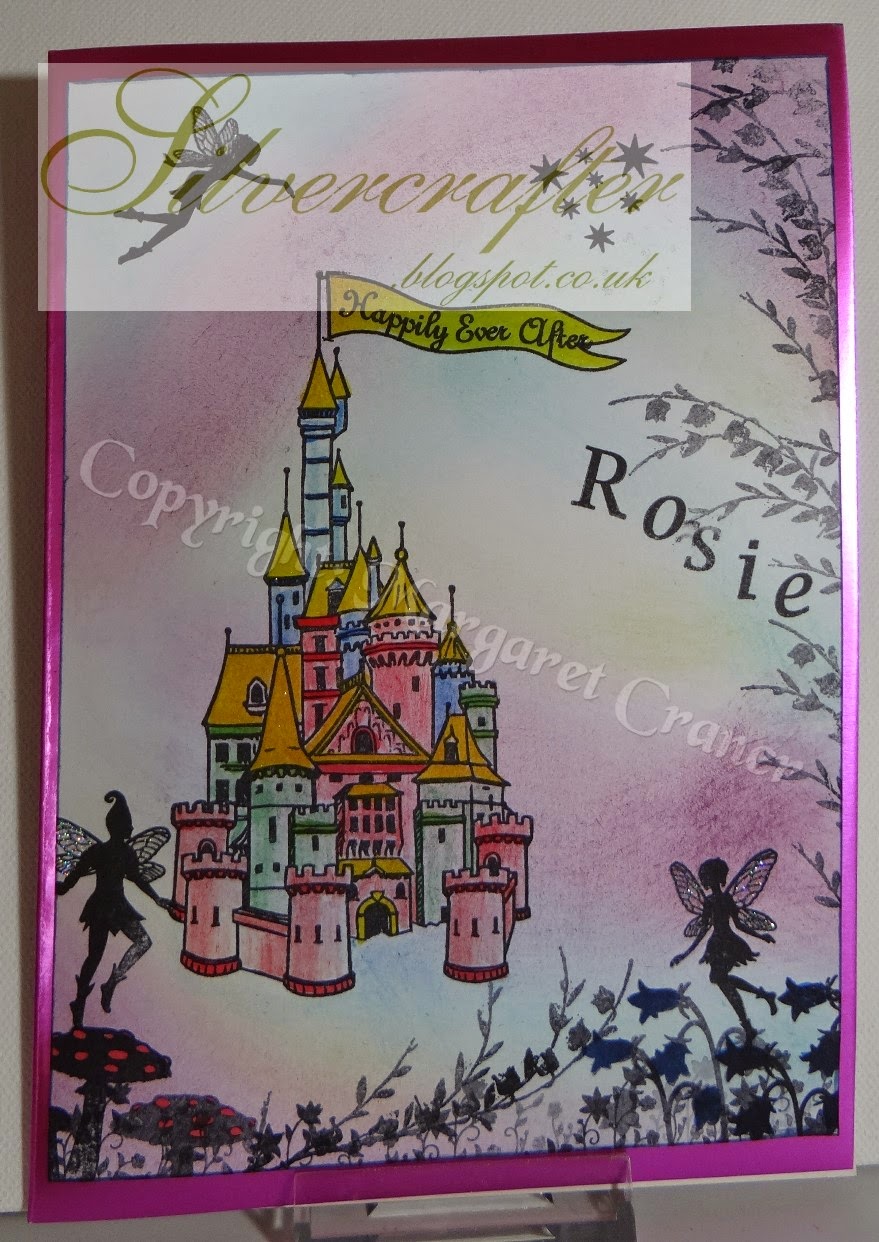
It also just happened that Barbara Gray had showcased her beautiful Wee Fairies and Elves on Create and Craft at the start of the month.  So for a four year old, the castle and the fairies had to be put together for this project.


It took a while to work out how to prepare and do the initial painting as it was the first time I had done anything like this.  I tried inks but soon came to the conclusion that I would never get the effect I wanted that way, so settled on watered down acrylics, pale blue in the top half blending to pale green at the bottom.  I think I used at least three coats to cover it properly, then I left it to dry overnight.


The following day, I set to work with the Wee Fairies, Elves and the Castle, stamping them with Archival Black.  Because of the slightly rough grain of the wood, I got a slightly distressed effect from the stamping, which I preferred to a smooth version.  The castle in the centre was stamped and inked on Theuva card and put behind the removable glass (designed for a photo).


Once all the painting was finished and thoroughly dried, I used the Crafters Companion Spray and Shine to seal it and give it some protection.  I sat out in the conservatory in the sun with the box balanced on one hand while I sprayed and turned each side in turn to the sun to dry it off.  Good thing no-one came to the door while I was doing it  as I could not put it down until it was dry.


Then I had to possess my soul in patience until the lacquer was thoroughly dry and hardened off before I could put the inserts back into place.  That was hard as I am not a desperately patient person.  I wanted it done right then.


The card was also covered with the castle and fairies.  I already had the background done from when I was filling in time at a class, waiting for everyone else to get to the right stage to continue that project.  

So all I need to do was the stamping of the images and colour them in with Derwent Coloursoft pencils which blend so beautifully.

As you can see, I have just learned to put watermarks on all my pictures to give my designs some protection so I hope you can see everything through them.

Ingredients
Wooden box (Pink Tulip Creations Ltd)
Wee Fairies (Clarity Stamp)
Wee Elves ( Clarity Stamps)
Castle (Clarity Stamps)
Letterbox Stamps (Clarity Stamps) 
Theuva Card (Clarity Stamps)
System 3 Acrylic Paints
Derwent Coloursoft Pencils
Crafters Companion Spray and Shine

Rosie was supposed to get this last Saturday, but the arrangements were changed at the last moment, but I am hoping that she will see it for real later this week.  I am off now to link this post up to enter the Clarity Stamp Challenge before March disappears completely.